Multiplex Your Terminal With Tmux

I’ve said this many times, but working on the terminal is just great! You get to be very productive, quick and (as a bonus) you look so cool! 😎 But, here’s the thing, terminals (especially when working over a remote connection) can be finicky. My question to you is, have you ever had one of the following happen to you:
- The connection to a remote server drops, making you lose all your work
- You need to leave in a hurry but want to leave the remote process running, not fearing it will go away (pesky timeouts 🔥)
- You have a system without a working X11 (or Wayland) environment and wish to multi task?
Yes yes, there are some native tools to help you with all this, but it gets
tedious to juggle the fg and bg commands all the time.
Allow me to introduce you to a tool that I use to solve all those things - the Terminal Multiplexer aka tmux.
tmux or screen?
Yes, yes, yes. Tmux is not the first piece of software to do this, there is the more famous GNU screen which has been here for ages. Actually, screen is the first one I’ve seen, but somehow, for some reason, I never got into it. I found tmux to be more approachable, more up my alley. What am I trying to say with this long-winded intro? This will not be a comparison between screen and tmux, nor will I attempt to say which one is better. I prefer tmux, but screen is ever present. Let’s not turn this into another vim vs emacs discussion.
The goal of this post is to set you up and running with tmux and give you a glimpse into how I configure and use tmux.
Installing tmux
This guide / post is intended to cover the installation of tmux for Linux, Mac OS. While you can run this under Windows (in WSL) I will not be giving that any special treatment as it is basically the same like under Ubuntu.
So how do I install? Oh, this is pretty straightforward, depending on your platform, but here are some options:
Arch Linux:
sudo pacman -Syy
sudo pacman -S tmux
Debian/Ubuntu:
sudo apt update
sudo apt install tmux
MacOS / Homebrew:
brew update
brew install tmux
Or if you wish to install it manually, check out their instructions
here. The only dependencies that
are needed for a manual compilation and install are libevent and
ncurses.
That was pretty simple, and straight forward, so what now? Open up your favorite
terminal and run tmux. 🚀
Keyboard shortcuts
This is where a lot of people just give up, as tmux is very vague about its default keyboard shortcuts and unless you start searching the Internet for the exact configuration, you see no difference (besides that green status bar) between this or your standard terminal. What now?
Before we get into the weeds of tmux key bindings, I must first explain the concept of the prefix. This is a key combination that precedes all other keys when interacting with tmux. So it is critical to know it, and to change it to something up your alley.
Let’s say you wish to do a specific action on tmux - split the screen. What you need to do first is, hit the Prefix and then the key that splits your screen. The default prefix is C-b (Control + b).
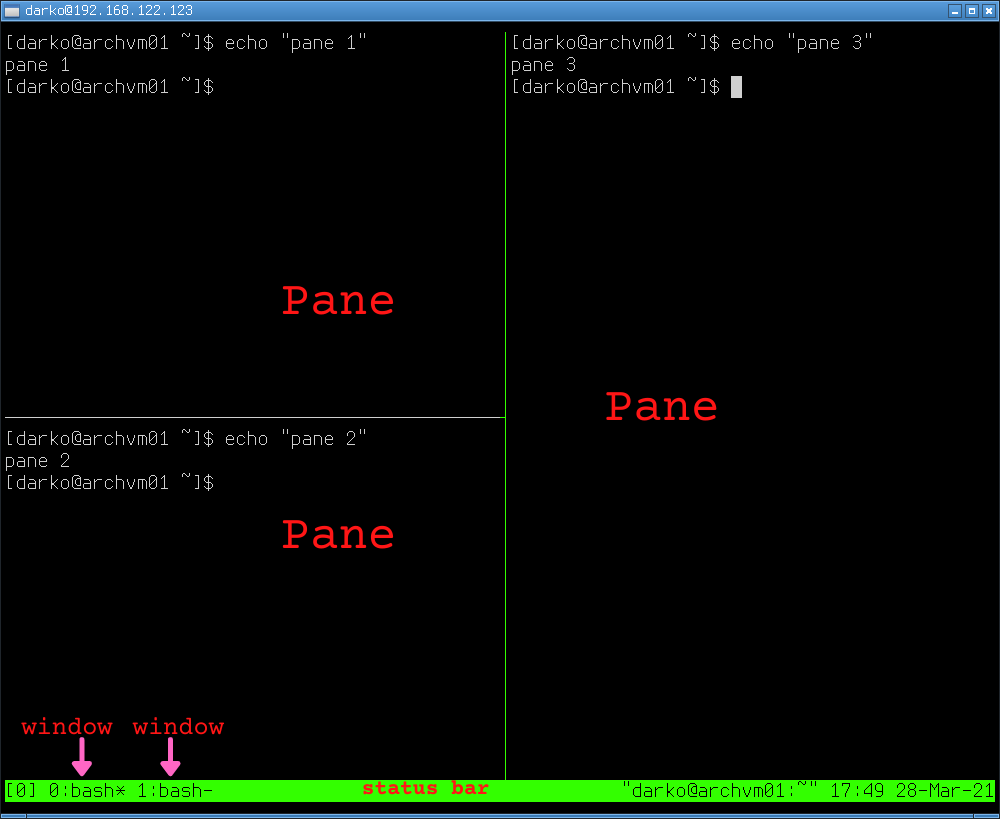
Okay, let’s start with the common uses of tmux with its default key bindings, and I will show you how I configure it myself. Remember the prefix is Control + b
| What you want to do | Key binding |
|---|---|
| Splitting the window in half vertically | Prefix + % |
| Splitting the window in half horizontally | Prefix + “ |
| Creating a new Window | Prefix + c |
| Switching between windows | Prefix + [0-9] |
| Switching between panes | Prefix + Arrow keys |
| Detach from tmux (leave it in the background) | Prefix + d |
And no, there is no big deal in exiting tmux. Just type exit until you have closed all your windows and panes.
But let’s say you wish to detach tmux, or send it to the background. Well, you
can do that with the Prefix + d. This will drop you back to your
tmuxless terminal. But how do you go back? Well, you can have multiple tmux
sessions available and running on your computer. To list them all just run
tmux ls this should get you something like this (if you have
multiple sessions running):
$ tmux ls
0: 2 windows (created Sun Mar 28 17:24:15 2021)
1: 1 windows (created Sun Mar 28 18:08:23 2021)
2: 1 windows (created Sun Mar 28 18:08:27 2021)
Now to attach to one of these you can either type tmux att which
will reattach you to your latest session, in my case it would be session 2.
But to attach to a specific session, you can type the following:
tmux attach-session -t $the_id_of_your_session
This covers the basics on how you interact and work with tmux and using the default key bindings. Which are fine, but they could be much much better.
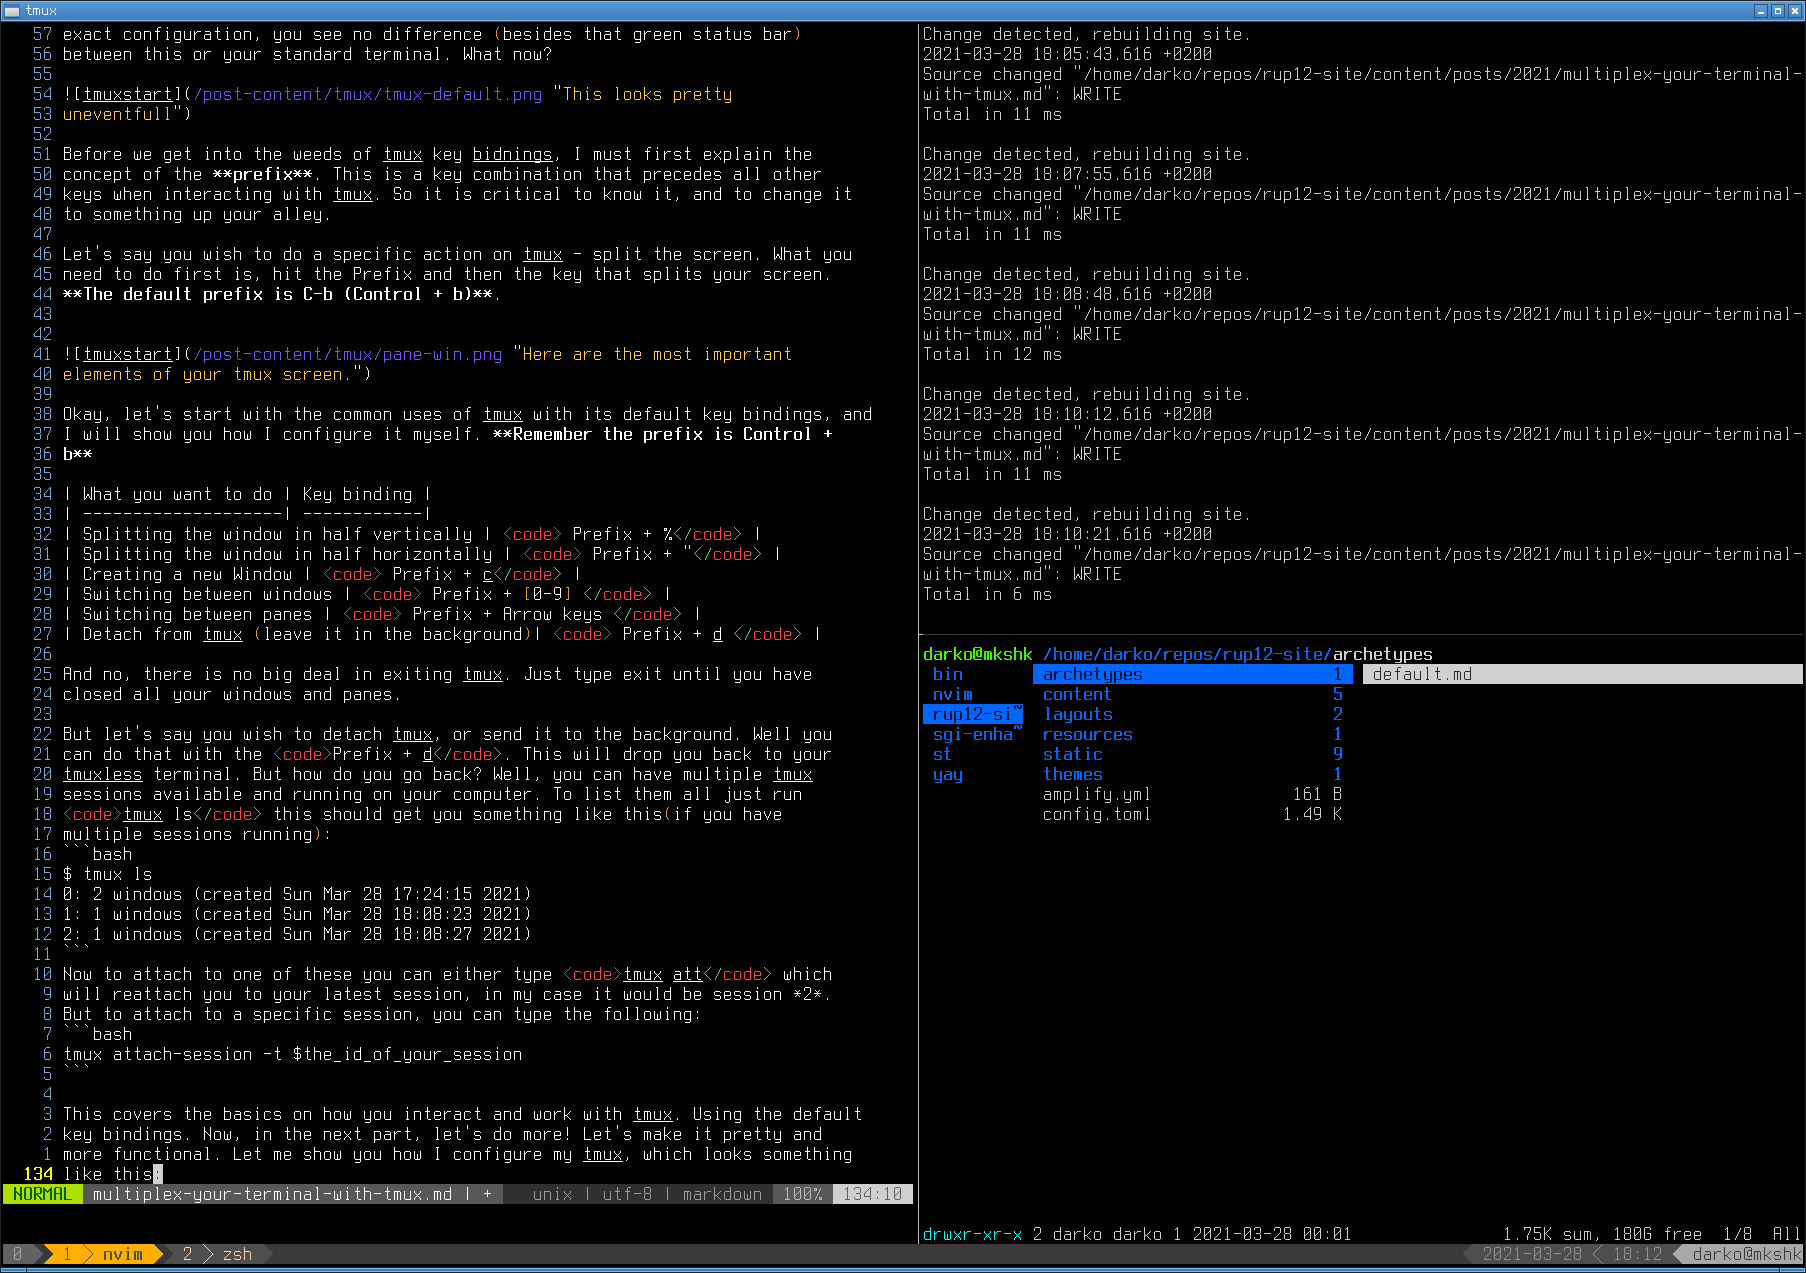
Time to do more with tmux! Let’s make it pretty and more functional. Let me show you how I configure my tmux, which looks something like this:
Configuring your .tmux.conf
This is the file where all your tmux configuration exists. And by default, tmux looks for it at the root of your home directory.
Basic configuration
Straight off the bat, let’s change that Prefix key! I am not a fan of the Control+b combination, as it makes me move my hands too much so I will remap it to Control+a. To do that, add the following lines to your fresh brand new .tmux.conf:
## Replace c-B with c-A
unbind C-b
set -g prefix C-a
bind-key -r C-a send-prefix
Time to add some colors to our terminal, and well keep any remote session
friendly. This is done by enabling the 256-color mode by setting the default
terminal to screen-256color. There are other options that might
work for you, but this one has been the most beneficial for me:
## Set 256 color mode
set-option -g default-terminal "screen-256color"
Window numbers are important, while - yes I know - all arrays start at 0. I prefer to have my tmux windows start at 1. Hence the following settings makes it so, and it also renumbers the windows, if I happen to close one.
## Number windows starting at 1, renumber as windows are added / removed
set-option -g base-index 1
set-option -g renumber-windows on
The copy mode of tmux is very powerful, it gives you the ability to scroll up
and down across the entirety of the output. And also, the ability to grab text
from there and yank it into your clipboard. The default key binding for this
is Prefix + [. The only thing I add to this, is the option to use
vi key movement as a personal preference.
## Use vim keybindings in copy mode
setw -g mode-keys vi
Performance
How about some speed and performance improvements? This is specific to my setup (as I happen to use neovim), but I am sure you can benefit from this as well.
So, let’s configure the title bar refresh interval, the setting that tells the tmux title bar how long to wait before updating its content (clock, weather, or what-not). And also, let’s configure the escape-time, the time in milliseconds for which tmux waits after an escape is input to determine if it is part of a function or meta key sequences.
## For neovim - escape time interval
set-option -sg escape-time 0

## Sets the refresh rate of the status bar
set -g status-interval 60
My custom key bindings
In this section we will look at the way I changed some of the default key bindings to things that make sense to me. It’s not much, but I am so much used to this now - that I would not change it.
Reloading your tmux configuration with a keystroke is paramount for anyone
who loves tinkering. So here is a simple key combination I set up just for
that: Prefix + r:
## Easy reload
bind-key r source-file ~/.tmux.conf \; display-message "~/.tmux.conf reloaded"
When it comes to managing windows and panes, I’ve made some changes in the way I transition between different windows and the keys that split my windows into panes.
Namely I love the option to quickly switch back and forth between two different
windows with a single keystroke. So, if I hit Prefix + Ctrl+A I get
to go back between the current window and the one I was before. Neat!
## Go back to last window
bind-key C-a last-window

## More intuitive pane splitting key-bindings, open all in current path
bind-key - split-window -v  -c '#{pane_current_path}'
bind-key \\ split-window -h  -c '#{pane_current_path}'
bind c new-window -c '#{pane_current_path}'

## Kill windows
bind-key C-w kill-pane
Finally, some resizing key bindings are in order. Here I just give me the ability to use the arrow keys with the combination of Shift or Control to change the size of the panes. As you can see here - there is no Prefix key needed.
## Easy resizing of panes with fine and coarse adjustment
bind -n S-Left resize-pane -L 2
bind -n S-Right resize-pane -R 2
bind -n S-Down resize-pane -D 1
bind -n S-Up resize-pane -U 1
bind -n C-Left resize-pane -L 10
bind -n C-Right resize-pane -R 10
bind -n C-Down resize-pane -D 5
bind -n C-Up resize-pane -U 5
Here is how some of my custom key bindings are setup now:
| What you want to do | Key binding |
|---|---|
| Reload your tmux configuration file | Prefix + r |
| Splitting the window in half vertically | Prefix + \ |
| Splitting the window in half horizontally | Prefix + - |
| Creating a new Window | Prefix + c |
| Switching between windows | Prefix + [0-9] |
| Switching between panes | Ctrl + [h,j,k,l] |
| Kill window | Prefix + Ctrl + w |
| Switch back to the previous window | Prefix + Ctrl + a |
| Resize panes in small steps | Shift + Arrow keys |
| Resize panes in big steps | Ctrl + Arrow keys |
Integration with vim
Here is one thing I need to have in my tmux setup so it would work with vim. Vim also supports splitting your screen into panes. In order not to confuse the two when working with both, I use one plug in for vim and a few lines of configuration for tmux for it to work. If you are not using vim, feel free to ignore this.
The first thing you need to do is install this plugin, into your vim setup. How you do that is up to you. Either manually or with the use of a vim plugin manager, there are instructions on the github page of this plugin.
Now, add the following lines to your tmux configuration file:
## Seamless aviation using vim-tmux-navigator (github christoomey/vim-tmux-navigator)
is_vim='echo "#{pane_current_command}" | grep -iqE "(^|\/)g?(view|n?vim?)(diff)?$"'
bind -n C-h if-shell "$is_vim" "send-keys C-h" "select-pane -L"
bind -n C-j if-shell "$is_vim" "send-keys C-j" "select-pane -D"
bind -n C-k if-shell "$is_vim" "send-keys C-k" "select-pane -U"
bind -n C-l if-shell "$is_vim" "send-keys C-l" "select-pane -R"
bind -n C-\\ if-shell "$is_vim" "send-keys C-\\" "select-pane -l"
And now you should be able to seamlessly switch between your vim panes and your tmux panes! #productivity 💥
Bring some colors into your life 🌈
Last, but definitely not least - some colors. Now this is the official Gruvbox dark color scheme, but with some minor tweaks to the status line. And the status line is pretty simple, no specific scripts, plugins or the like (weather, battery …). I like to keep it light like that!
Just a note about the colors here. Tmux is using the 256 color capabilities of
my terminal. So when it says colour222 this refers to the exact
color in the terminal - so your mileage may vary.
BTW: If you wish to see what your colors are, you can run this simple bash one-liner:
for COLOR in {1..255}; do echo -en "\e[38;5;${COLOR}m${COLOR} "; done; echo;
Onward to the colorscheme 🚀
Here is how my status bar looks right now, with he latest changes implemented:

And this is the part of my .tmux.conf that configures all that, so
feel free to copy paste it into yours.
# C O L O R S
## COLORSCHEME: gruvbox dark
set-option -g status "on"

# default statusbar color
set-option -g status-style bg=colour237,fg=colour223 # bg=bg1, fg=fg1

# default window title colors
set-window-option -g window-status-style bg=colour214,fg=colour237 # bg=yellow, fg=bg1

# default window with an activity alert
set-window-option -g window-status-activity-style bg=colour237,fg=colour248 # bg=bg1, fg=fg3

# active window title colors
set-window-option -g window-status-current-style bg=red,fg=colour237 # fg=bg1

# pane border
set-option -g pane-active-border-style fg=colour250 #fg2
set-option -g pane-border-style fg=colour237 #bg1

# message infos
set-option -g message-style bg=colour239,fg=colour223 # bg=bg2, fg=fg1

# writing commands inactive
set-option -g message-command-style bg=colour239,fg=colour223 # bg=fg3, fg=bg1

# pane number display
set-option -g display-panes-active-colour colour250 #fg2
set-option -g display-panes-colour colour237 #bg1

# clock
set-window-option -g clock-mode-colour colour109 #blue

# bell
set-window-option -g window-status-bell-style bg=colour167,fg=colour235 # bg=red, fg=bg

## Theme settings mixed with colors (unfortunately, but there is no cleaner way)
set-option -g status-justify "left"
set-option -g status-left-style none
set-option -g status-left-length "80"
set-option -g status-right-style none
set-option -g status-right-length "80"
set-window-option -g window-status-separator ""

## Status Bar
set-option -g status-left "#[fg=colour250, bg=colour241] #S #[fg=colour241, bg=colour237, nobold, noitalics, nounderscore]"
set-option -g status-right "#[fg=colour239, bg=colour237, nobold, nounderscore, noitalics]#[fg=colour246,bg=colour239] %Y-%m-%d #[fg=colour230,bg=colour244] %H:%M #[fg=colour248, bg=colour239, nobold, noitalics, nounderscore]#[fg=colour237, bg=colour255] darko@#h "

set-window-option -g window-status-current-format "#[fg=colour237, bg=colour214, nobold, noitalics, nounderscore]#[fg=colour239, bg=colour221] #I #[fg=colour239, bg=colour214, bold] #W #[fg=colour214, bg=colour237, nobold, noitalics, nounderscore]"
set-window-option -g window-status-format "#[fg=colour237,bg=colour239,noitalics]#[fg=colour223,bg=colour239] #I #[fg=colour223, bg=colour239] #W #[fg=colour239, bg=colour237, noitalics]"
Wrap up and links to stuff!
Ever since I’ve started using tmux (about 6 years ago), it has changed the way I approach working with terminals. Long gone are the days of multiple different open terminal windows across the desktop. I’ve even stopped using the built-in tabbing capabilities of some modern terminal emulators. And now have the ability to jump on a system, and even without access to a fancy X11 Graphics environment, am able to multi task and be much more productive. This has proved to be especially useful when working on remote systems with SSH.
On top of all that, just the fact that you can split your screen into multiple different terminals, and arrange them to your liking. Gives you the ability to make your vim setup into a proper Development Environment.
Hopefully this post has given you some inspiration to use tmux, and that the configuration shared here can help you make your tmux environment just the way you want it.